1. Firstly, go to www.cudominer.com click sign up and download. Cudo Miner supports Windows 7 or later (x64) , Ubuntu, CudoOS and ASIC.
Setup instructions page
Cudo Miner Setup Guide
Your step by step guide on installing and setting up Cudo Miner

2. Create An Account OR if you already have an account Enter your username and login. Sign up for a Cudo Account by entering your Email Address and Password or by using one of the alternative methods listed.

3. Enter your Name and your Username (username automatically removes spaces ), this will be displayed in the Cudo web console and on the Cudo Miner Application. CLICK save to continue. Make a note of your Username and Password. You will then need to go to your emails and verify your account CLICK verify account and then continue.

4. Welcome to Cudo Miner click the Get started button to proceed. The default payout coin is set to BTC you change this by going to settings > payment. Payout coins are BTC, Ethereum, and Monero. For more info on mineable coins please visit this page

5. Clicking the get started button will take you to the device setup page. where you can click on setup a device. This will bring up installation instructions for you to follow and install on your chosen operating system. Alternatively, when logged into the console go to the Devices tab and click Connect a device or Setup a device.


6. Once you have installed you can start to configure your settings. The onboarding screen on the desktop app gives you the chance to choose your settings to get started with. You can choose to Enable Third-Party Miners to allow Cudo Miner to download closed source miners. While we do our best to ensure they are safe, we do not take responsibility for any issues caused by them. Tick the box to confirm you understand the risk. You can also set up your own custom configuration per device in the console by going to devices > configurations. More info here

7. The SETTINGS tab allows you to go back and change any of the settings from the onboarding screen including enabling/disabling CPU and GPU over-clocking. Advanced users you can go into the miners Advanced Settings, which will let you optimise your configurations to your mining preferences.

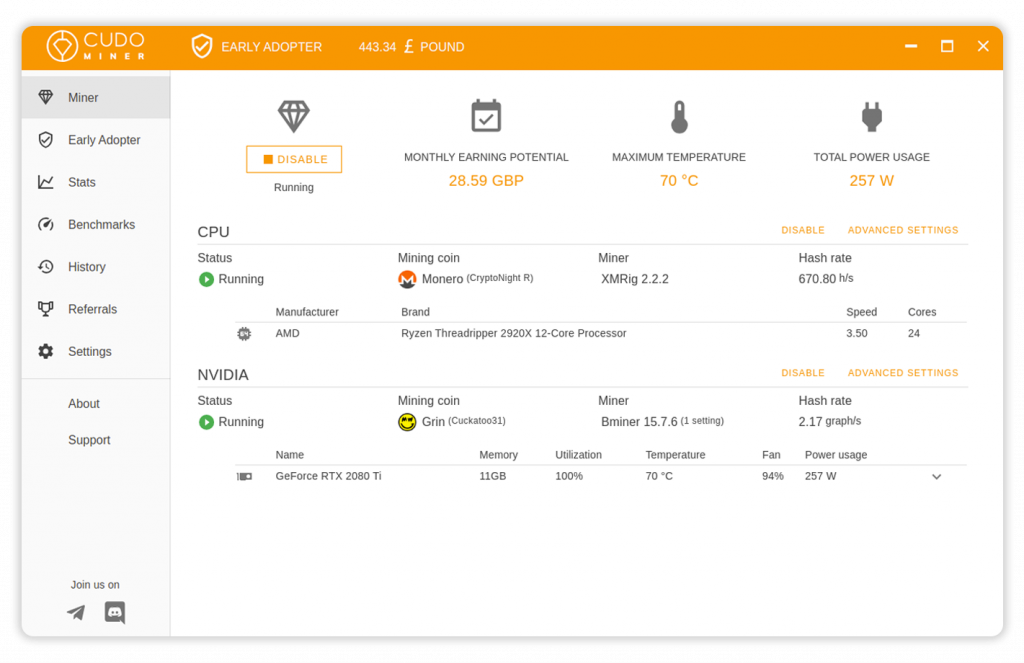
8. Depending on your operating system you will then just need to CLICK ENABLE and the software will begin. It will begin benchmarking and optimising this can take between 1 – 3 hours to complete but your software will be mining generating revenue during this time. There it will then continuously benchmark throughout, so you are always mining the most profitable coin. So sit back relax and go make a cup of tea.

9. DEVICES MENU in the console expands for each device to display hardware and drivers installed, benchmark results, current mining status and GPU health data including temperature and wattage.

10. TRANSACTIONS tab in the web console allows you to withdraw funds (you can choose your payout coin option within the Settings Menu). in the currency of your choice. Simply CLICK withdraw funds and put in your wallet address. Please note that there is a minimum withdrawal amount of 0.002 BTC or equivilent.

Refer a Friend
11. Earn more by referring friends. For tracking Referrals Menu in the Web Console. Here you will find your unique referral link which can also be found in the Miner application.
12. Setting up multi-factor authentication on your account. You can either click Get started button in the blue banner at the top of the console dashboard page or go to your profile in the top right and click the Security tab. Please make sure when you set up MFA you generate BACK UP CODES as well because if you lose your codes or device you won’t be able to withdraw from your account.

Become part of the community...
Now you’re all set up and mining away, come join us on our Telegram to give feedback, ask questions and request support. Also, follow us on Twitter and like our Facebook page.


